It’s been a while since I’ve bought a wargames magazine, but finding myself at a loose end on a journey back to Bristol from the far north (Doncaster to be precise), I decided to treat myself to the latest issue of Miniature Wargames (March 2011). Just as well, because otherwise I would have missed Chris Hahn’s hypothetical account of a battle between the Spanish (recently landed from the successful Armada crossing) and Elizabeth’s English levies. This “what if” scenario got me thinking, and inspired me to try out a similar speculative scenario set a few decades earlier. This time it’s the French who have successfully disembarked a landing force on English soil, and it’s Liz’s dad Henry who has to face them in battle as they move inland.
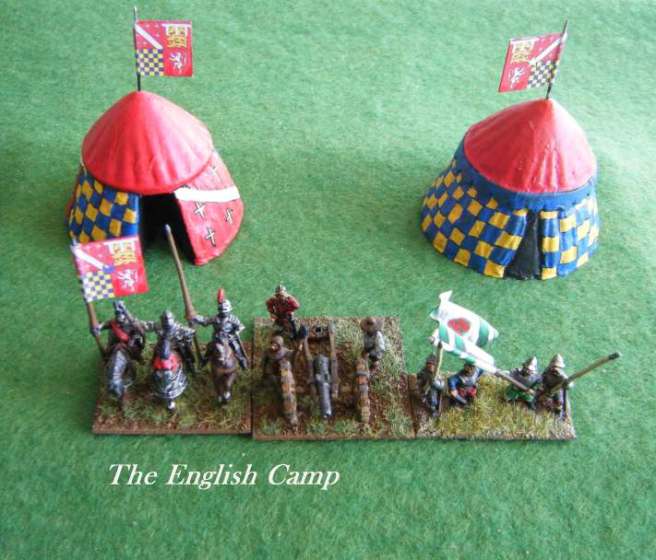
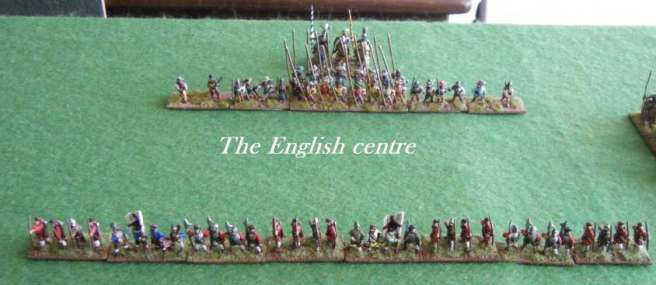
The English force consists of the usual “bills and bows”, a sizeable contingent of German mercenaries (including a large rearwards reserve), some border horse, three artillery pieces, and a handful of heavy cavalry. Somewhere off the table a small force of English volunteers (indifferently armed and trained) are marching to the sound of the guns – they will arrive at some point in the battle, but precisely when and from which direction remains to be seen. The English are very much on the defensive, and will hold their positions unless and until the French (controlled by me) take the initiative; at that point each wing of the English army will have its course of action determined by “percentage probability” dice throws, having weighed up the chances of a good officer taking one or other of the available courses of action.
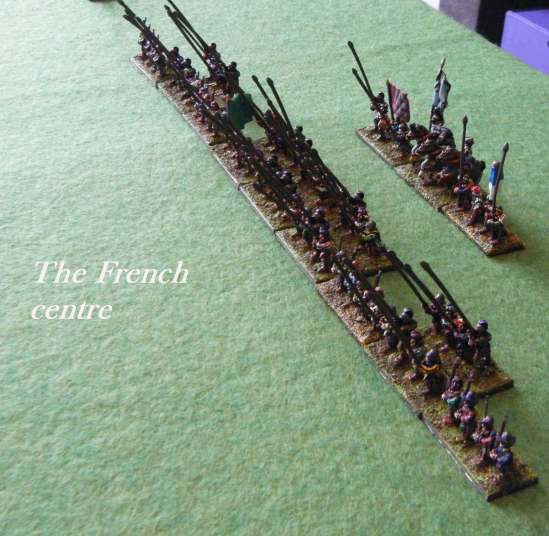
The French have landed a strong, well balanced army, but have not had time to bring up their artillery. They field the more modern pike and shot combination, as well as their usual strong force of gendarmes and well-trained light horse. They are aware of the possibility of English reinforcements, and have therefore every incentive to attack the English positions as soon as they are able.
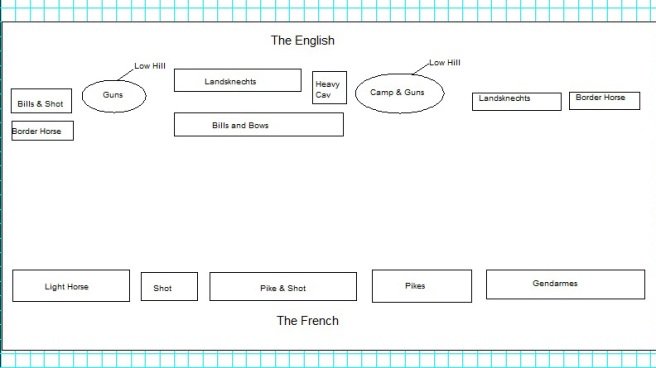
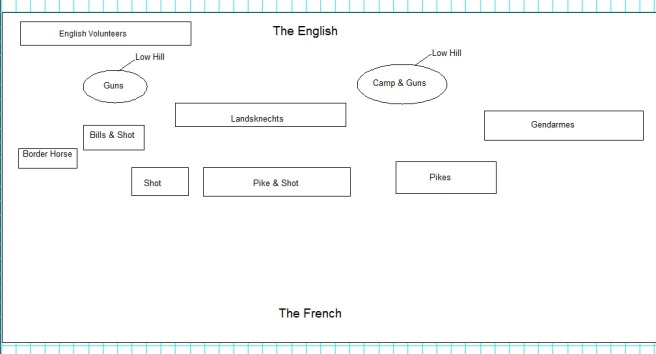
This is the layout of the battlefield once the two armies have deployed:
Turn One: My line advances, contracting at certain points to avoid the enemy artillery positions as far as possible. The English hold position, apart from the Heavy Cavalry in the centre, who move to reinforce and extend the central line of Bills and Bows.
Turn Two: My French continue to advance, though a split starts to appear in the centre where the centre-right begins to lag behind. The English respond by mustering their troops into a single line on either flank, and two units of Landsknecht pikemen come down off the low hill nearest their right flank to threaten my Shot.
Turn Three: I continue to advance, but the split in my centre widens further. The English left (Landsknechts and Border Horse) advance slowly towards my gendarmes, somewhat against the odds, reinforced by an additional pike unit from the adjacent hill. On my own left my advancing Light Horse now face a solid line of mixed English troops. Meanwhile the English guns on the hill to the right of their line are moved to provide better cover to the infantry.
Turn Four: My advance on the left halts as I attempt to bring up my Shot. In the centre too I hold while the stragglers catch up with the main line. The gendarmes continue to canter forwards. The English and Germans facing them continue their advance, though the additional pikes that moved last turn grind to a halt. In the centre the English continue to adjust their lines, while on the English right the main force halts. The Landsknechts that advanced down from the hill, however, have ideas of their own – and charge towards my lines!
Turn Five: On my left, I turn my attentions to screening the advancing English and cutting off the detached Landsknechts. As the English centre continues to hold its position, I advance with the majority of my troops but still have problems with a large split in my battleline. On my right flank, my gendarmes and the mixed English/German force facing them are almost within charging distance now.
Turn Six: With troops about to engage on both flanks, the English centre finally advances…
Turn Seven: The two flanks move into contact. The ensuing combats are indecisive, with both sides taking minor losses. The English centre continues to advance as I attempt to form up my troops to face them.
Turns Eight & Nine: My gendarmes are slowly getting the better of it on my right flank, seeing off the English Border Horse. But it’s stalemate on my left flank, where the English and my Light Horse and Shot have fought themselves to a standstill albeit with the loss of the wayward Landsknechts that came down off the hill! There is still no sign of the English volunteer relief column. The two main masses of infantry in the centre will soon clash…
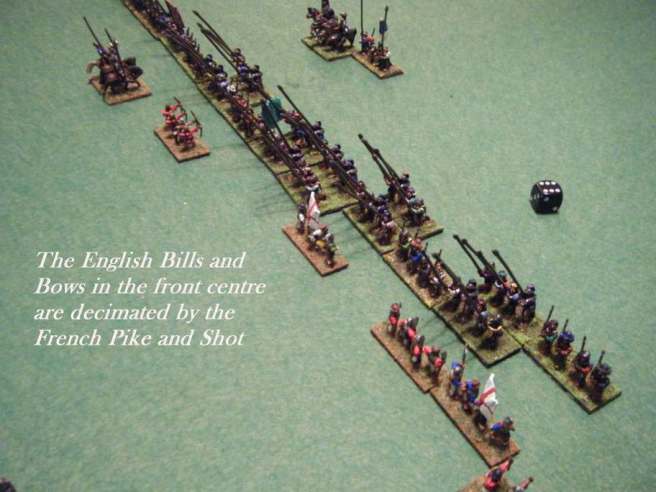
Turns Ten & Eleven: The English centre crumbles as the Bills and Bows face but fail to stop the state-of-the-art French infantry. Meanwhile my left flank has all but disintegrated, while my gendarmes are grinding out a narrow advantage over on my right flank. With the English Landsknecht mercenaries still advancing in the centre rear, the game is still finely balanced.
Turn Twelve: The English finally succumb on my right flank, their ragged German pikemen and arquebusiers being surrounded and cut down by my gendarmes. In the centre, the Bills and Bows have virtually been annihilated. On the English right, the rosbifs have the advantage, and only a few of my mounted units and shot remain intact. And it is precisely at this moment that the English reinforcements arrive, appearing on the baseline of the English army on their right flank!
Both sides now have troops scattered across the battlefield, and the situation is indecisive. The unengaged Landsknechts and the reinforcements mean that the English are far from beaten. My left flank has disintegrated, and my right is a little ragged. While my centre remains strong and has taken few losses, I don’t much like the look of the situation and decide to retreat and re-group. The English commanders opt to do the same rather than press home with an immediate and rather risky counter-attack (a decision determined by dicing for percentage-weighted options), and draw back to reform their own lines and integrate the newcomers. The battle appears to have reached a stalemate.
This is a simplified diagramatic representation of the situation at the end of the first phase of the battle:
Once the two armies have reformed, the fight will no doubt continue…

